
Do you want that perfect healthy summery glow but summers won't be here for another few months- Well That's okay- Let me show you how to create that same summer look even in the fall, winter and springs months : )
Here is a list of everything I used :

1. Loreal True match foundation in Cappuccino
2. Hard Candy-So baked Bronzer in Hula Hula
3. Maybelline Matte Eyeshadow in Earthy Taupe
4. Maybelline Mascara in Lash Stiletto Voluptuous (Not-waterproof kind- it flakes)
5. Mac's Color Cream Base (highlighter) in Pearl
6. Maybelline Lipstick 740 in Sparkling Sand
7. Sonia Kashuk Smudge liner in Blackest
8. Sephora's Nano eyeliner in Nuage
9. Tarte Eyelash curler
10. Urban Decay's Sustainable Shadow Box
11. Mac's Paint Pot in Soft Ochre
12. Mac's Paint Pot in Rubenesque
13. Mac's Paint Pot in Blackground
14. Maybelline Dream Mousse Shadow in Ivory Illusion
Swatches of The Products being used

*Just in case you have a color shadow, cream base primer or lipstick etc. that's close to the colors I'm using.
1.Loreal True match foundation in Cappuccino
2.Mac's Paint Pot in Soft Ochre
3. Mac's Paint Pot in Rubenesque
4. Mac's Paint Pot in Blackground
5. Maybelline Dream Mousse Shadow in Ivory Illusion
6. Mac's Color Cream Base (highlighter) in Pearl
7. Maybelline Lipstick 740 in Sparkling Sand
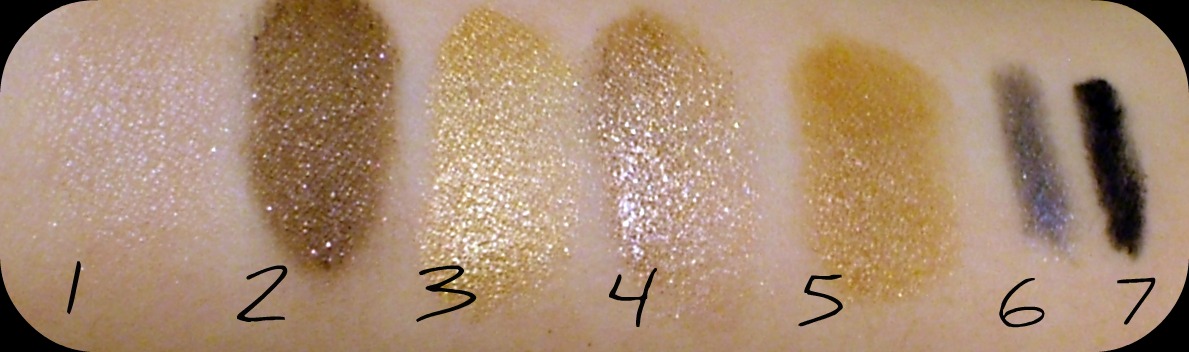
1. Maybelline Matte Eyeshadow in Earthy Taupe
2. Twice Baked- from Urban Decay Sustainable palette
3. Half Baked- from Urban Decay Sustainable palette
4. YDK- from Urban Decay Sustainable palette
5. Hard Candy-So baked Bronzer in Hula Hula
6. Sephora's Nano eyeliner in Nuage
7. Sonia Kashuk Smudge liner in Blackest
Now for the Application: First apply your Primer> foundation> concealer> Powder (Not that it matters but just in case you were wondering I used Facial primer by Clinique, Maybelline Dream Matte Mousse in Classic Ivory, Maybelline Dream Mousse Concealer in Light, and Revlon's Photo Ready Powder in 020 Light Medium)
After you are done with your Foundation and concealer- It's time for your bronzer- This is what will give you that sun kissed glow ♥ (You do not have to by a liquid bronzer)- I simply used Loreal's True match foundation in Cappuccino, The reason for this is because It is glitter-less and will blend easily over your foundation- and because it is a darker skin colored foundation it will look more natural. Now keep in mind this is a very dark shade and you will not need to apply much of it- just use about a pea sized amount per half the face (this includes the cheek and forehead)If you need a little more just grab a dab or two- this little bit shall go a long way.
Bronzer Application
Just in Case you do not know where to apply bronzer I have made up a diagram to show you where the correct placement of bronzer should be. The picture below is just to give you an idea on where your bronzer should be placed this heavy application is Not to be taken seriously LOL- but I'm pretty sure you'd figure that out pretty quickly after walking around the store while ppl stared at you an laughed LOL
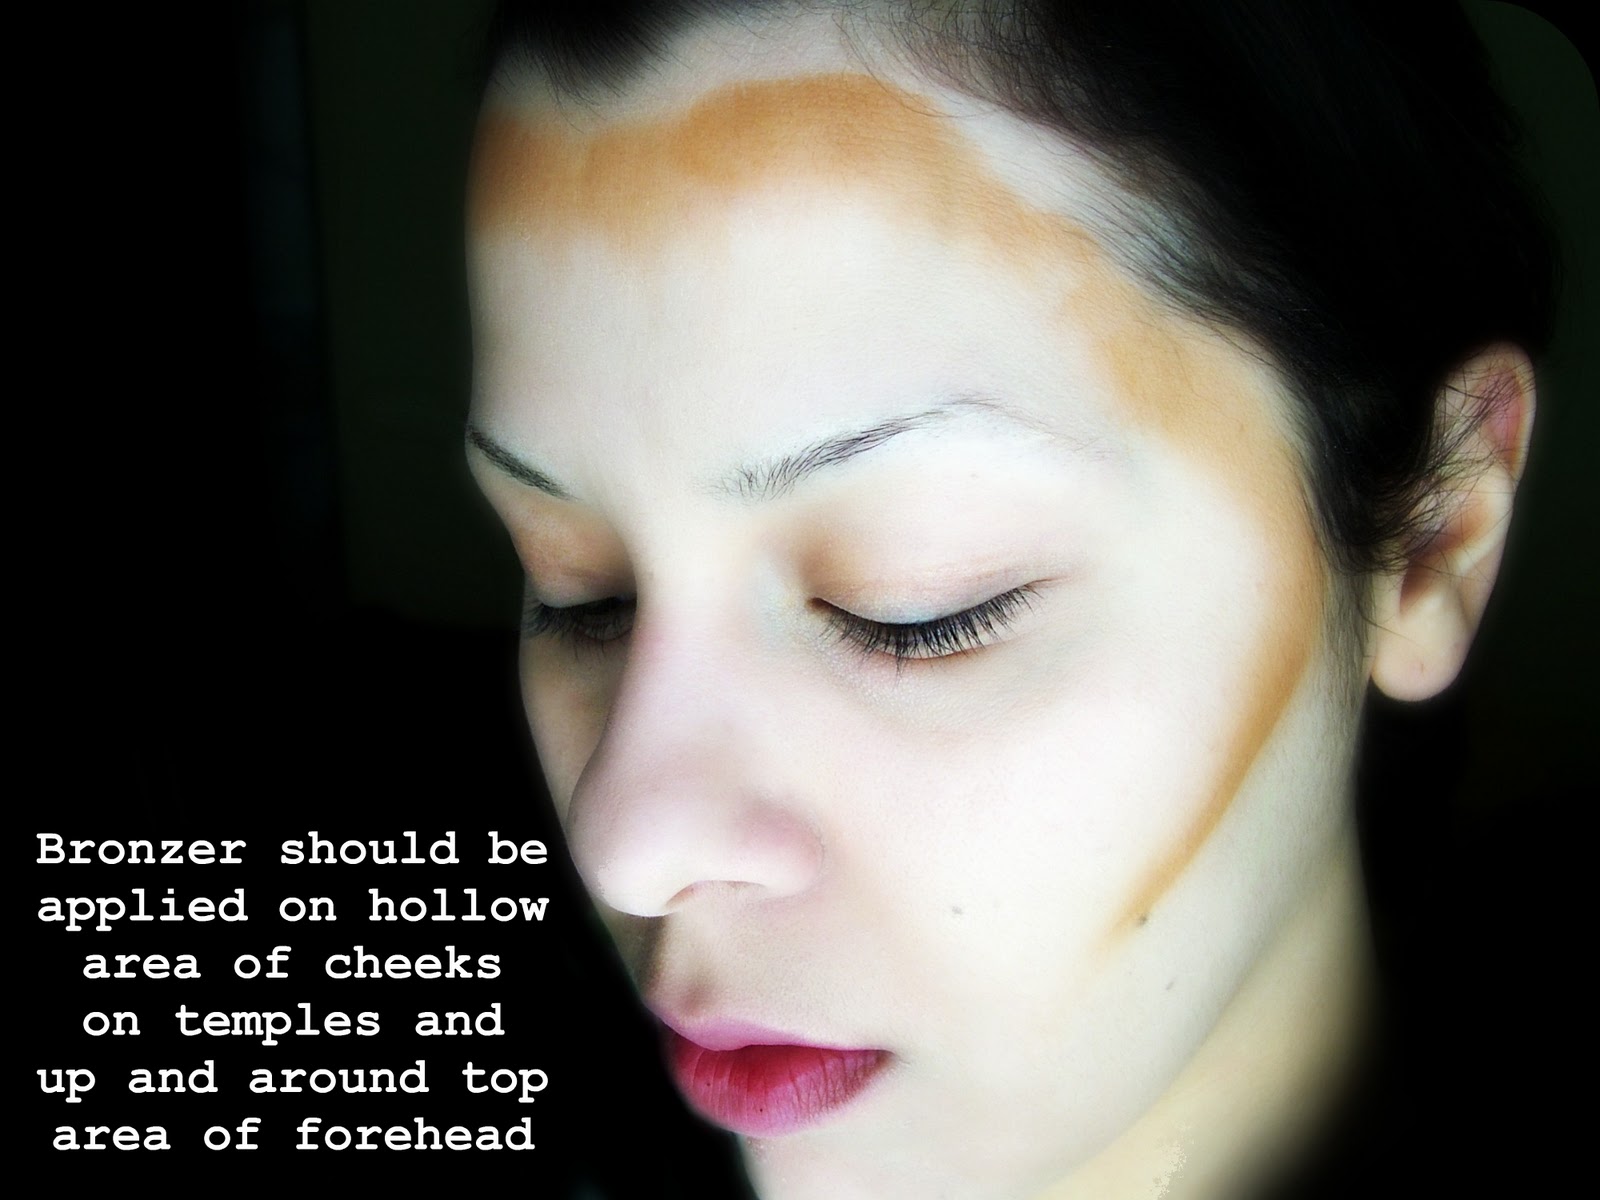
After you are done applying the bronzer liquid, use your fingertips to blend that foundation upward on the cheeks and in a circular motion around temples and forehead- don't forget to blend into the hairline- you don't want to see a pale line between your bronzer and hair- That would Not be cute haha. Reminder:(Never lose the original placement of your bronzer- You want to stay in those same areas just blending it in well so you don't see a harsh line of the beginning of your bronzer)
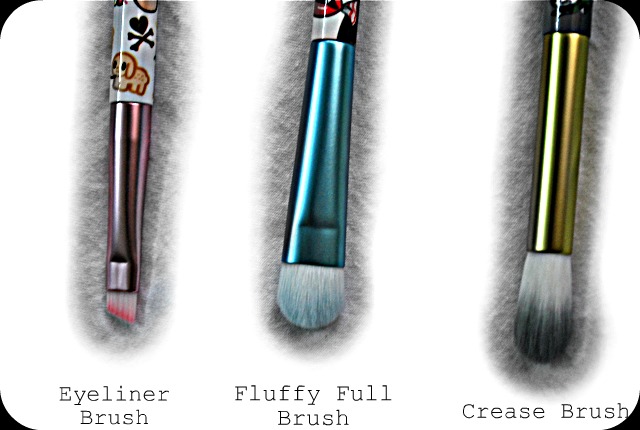
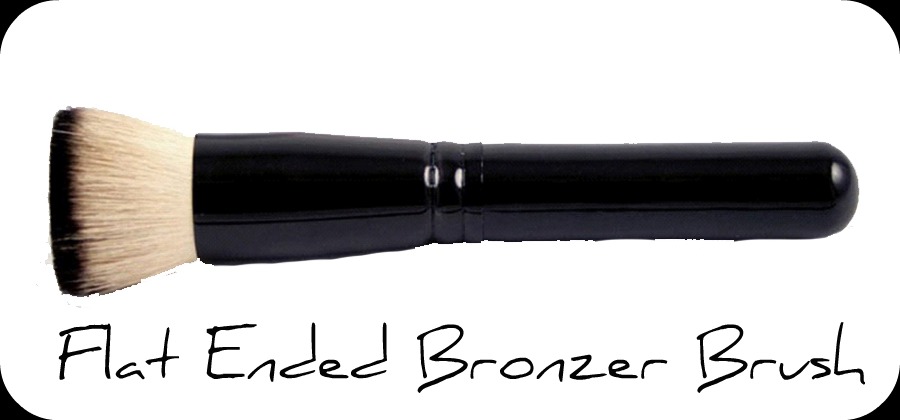
-When you are done applying your bronzer use So Baked Bronzer in Hula hula by Hard Candy to go over those areas again with your bronzer brush. (Picture of brush Shown Above)
Next you'll want to add your primer to eye's, I used Mac's Paint pots in Soft Ochre, Rubenesque and Blackground, Please follow diagram below for correct placement of eye primer for this look.

I first added my Blackground primer to my lash line both upper and lower lash line. Staying very close to lash line and not making it too dark, Remember to lighten as you go up. While applying Blackground I used my Urban Decay Blending Brush for easier application. but you can use your fingertips if you choose> Just be careful not to apply too much and too thick.

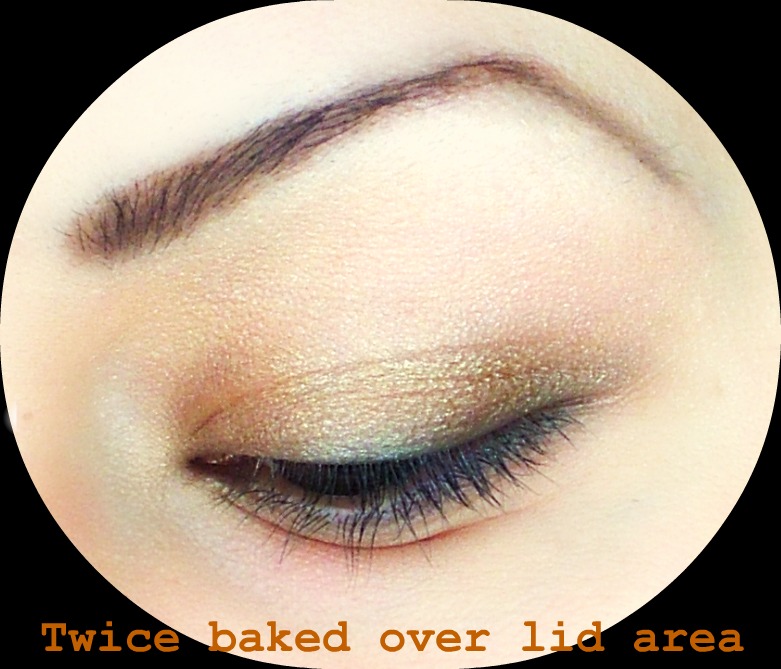
Now apply your Twice baked Shadow from Urban Decay's Sustainable Palette just over your lid area using your fluffy brush
Now apply your Half Baked Shadow from Urban Decay's Sustainable Palette inside your crease area using your crease brush

Then apply YDK Shadow from Urban Decay's Sustainable Palette just over your crease blending Half baked and YDK slightly together

Next apply your cream shadow in Ivory Illusion from Maybelline Dream Mousse Shadow over your brow bone slightly breaking up the line between Ivory Illusion and YDK

Now it;'s time to add eyeliner, I used Sonia Kashuk's Smudge liner in Blackest, but you can use any smudge liner that's black.

You'll want to add this as close to your lash line as possible and onto your waterline both top and bottom and smudge it in with the back of the pencil just to get it as close into your lashes as possible.
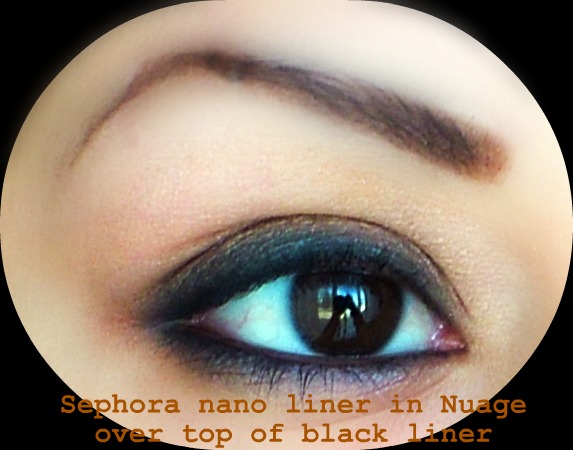
Now grab Sephora's Nano eyeliner in Nuage and just go over the top of your black liner with that- this will give the illusion of a Smokey wet eye- very sexy ☺
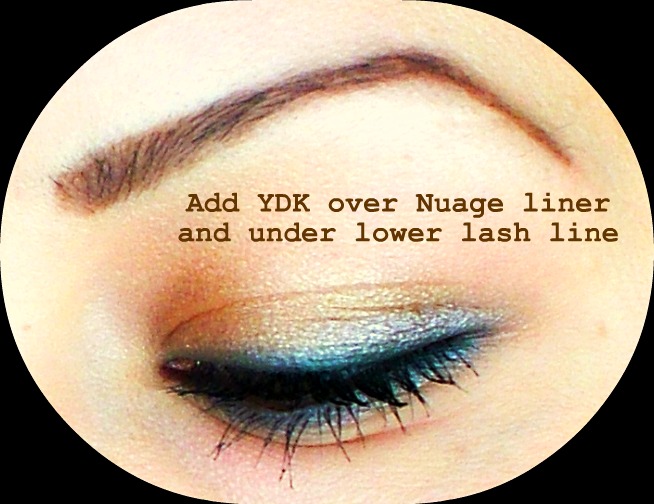
Then take your YDK shadow again and go over the top of Nuage liner using your crease brush just to soften that harsh line up a bit. Now Curl your lashes with your Tarte Eye lash curler- or whatever eyelash curler you own. Remember: To count 5 Mississippi's for each eye while you squeeze your eyelash curler for maximum hold and curl : D
Then apply your Mascara using Maybelline's Mascara in Lash Stiletto Voluptuous (Not the waterproof kind because it flakes) Yuck!
And your eye makeup is a wrap ☺
It's time for your highlighter in Pearl by Mac- Using your fingertip apply a small amount of highlighter to the bridge of your nose, around the outer corners of your eyes and Add a touch of highlighter to cheek bones, chin and temples.
For your lips- Use your lipstick from Maybelline in Sparkling Sand apply that over your lips for a soft frosty color making that bronzed color really pop- and give your cheeks another quick brush with your bronzer powder and you are done! Ready to go out and flaunt your beautifulness : D This look is Lush, Semi natural looking and just plain Sexy! I love it Tell me what you think Ladies, i'd love to hear your feedback <3

No comments:
Post a Comment